TL;DR: Yes, you can paint a tile backsplash, and the results can look surprisingly good when you do it right. The key is thorough cleaning, a bonding primer made for slick surfaces, and a durable topcoat like epoxy or high-quality acrylic paint. A painted backsplash won’t last as long as new tile, but it’s a fraction of the cost and can hold up for three to five years with proper care. It’s one of the best budget-friendly kitchen upgrades you can make.
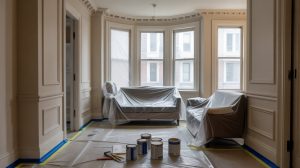
Yes, you can absolutely paint a tile backsplash. Whether it’s dated ceramic, old porcelain, or a stone tile that doesn’t match your style anymore, paint is a legitimate way to transform it without ripping anything off the wall. The whole project can be done in a weekend for under $100 in materials.
That said, there’s a big gap between a painted backsplash that looks polished and one that starts peeling within a few months. We’ve seen both. The difference almost always comes down to prep work, product choice, and knowing which situations are a good fit for paint versus a full replacement. Below, we’ll walk through everything you need to know before you pick up a roller.
Why Would You Paint a Tile Backsplash Instead of Replacing It?
The short answer is time and money. Tearing out an existing backsplash means demolition, possible drywall repair, new tile, adhesive, grout, and a full day (or more) of installation. For a standard kitchen backsplash, you’re looking at $800 to $2,000 or more with professional installation.
Painting that same backsplash costs $50 to $150 in materials and takes a weekend. For apartment renters who can’t make permanent changes, or homeowners planning a full renovation down the road, it’s a smart way to bridge the gap.
Painting also gives you complete color freedom. You’re not limited to what’s available at the tile store. Any color you can mix at the paint counter is an option.
What Types of Tile Can You Paint?
Almost any tile backsplash can be painted, but some surfaces take paint better than others. Here’s what we see most often.
Ceramic and porcelain tile are the most common backsplash materials, and they respond well to paint. The glazed surface needs proper prep (more on that below), but once you scuff it up and prime it, paint adheres nicely.
Glass tile is trickier. The surface is extremely smooth, which makes adhesion harder. It can be done, but you’ll need an aggressive bonding primer and extra care during sanding. A second coat of primer is essential.
Natural stone like travertine, marble, or slate is actually one of the easier surfaces to paint because it’s naturally porous. The texture gives paint something to grab onto. Just be aware that the grout lines on stone tile tend to be wider, which means more paint and more drying time.
Metal tile and decorative accents can be painted too, but you’ll want a primer specifically designed for metal surfaces. Knowing when to prime before painting is critical here, because skipping it on a slick surface like metal or glass will almost guarantee failure.
The one type we’d steer you away from? Tile that’s already cracked, loose, or has significant water damage behind it. Paint won’t fix structural problems. If tiles are falling off the wall or the grout has major gaps, it’s time for replacement, not a paint job.
How Do You Prep a Tile Backsplash for Painting?
Clean it thoroughly with a degreaser, repair any damaged tiles or grout with paintable caulk, sand the entire surface with 220-grit sandpaper, and tape off surrounding areas. Prep takes longer than the actual painting, but it’s the single biggest factor in whether your paint job lasts months or years.
Here’s the full process we follow.
Step 1: Deep clean the tile. Kitchen backsplashes collect grease, oil, and cooking residue that you can’t always see. Use a degreaser like TSP (trisodium phosphate) mixed with warm water and scrub every tile and grout line with a sponge. Rinse thoroughly with clean water and let it dry completely. If you’re working in a bathroom, treat for mold or mildew first with a mold-killing cleaner.
Step 2: Make repairs. Fill any cracked or chipped tiles with paintable acrylic caulk (not silicone, which paint won’t stick to). Patch damaged grout lines with fresh grout or acrylic caulk. Let everything cure fully before moving on.
Step 3: Sand the surface. This is the step most people want to skip, and it’s the one that matters most. Use 220-grit sandpaper to scuff the entire tile surface by hand or with an orbital sander. You’re not trying to remove the glaze completely. You’re just creating a slightly rough texture that gives the primer something to grip. If you’re unsure about what grit sandpaper to use before painting, 220-grit is the sweet spot for tile. Wipe away all dust with a damp cloth afterward.
Step 4: Apply a liquid deglosser (optional). For extra-glossy ceramic or glass tile, a chemical deglosser can help break down the slick surface even further. Apply it with a clean cloth and let it dry per the manufacturer’s directions.
Step 5: Tape off everything. Use painter’s tape on countertops, cabinets, walls, outlet covers, and any area you don’t want paint to touch. Drop cloths on the countertop are a good idea too.
What’s the Best Paint and Primer for a Tile Backsplash?
Use a bonding primer like INSL-X STIX or Zinsser Bulls Eye 1-2-3, followed by either two-part epoxy paint, tile-specific acrylic, or a high-quality acrylic enamel in satin or semi-gloss. The primer matters more than the topcoat. Without a proper bonding primer, even the best paint will peel off glazed tile.
Not all paint is created equal, and this is one project where you can’t get away with whatever’s left over in the garage. Using the wrong products is one of the main reasons paint starts peeling off surfaces after just a few weeks.
For primer, use a bonding primer designed for slick, non-porous surfaces. INSL-X STIX Waterborne Bonding Primer is an industry favorite for tile work. Zinsser Bulls Eye 1-2-3 and Sherwin-Williams Extreme Bond Primer are also solid choices. These primers create a tacky, grippy surface that helps the topcoat stick to glazed tile.
Apply two thin coats of primer with a foam roller for the flat tile surfaces and a brush for grout lines and edges. Let each coat dry fully before applying the next. Don’t rush this. The primer needs to cure properly to do its job.
For the topcoat, you have a few options:
- Two-part epoxy paint is the most durable choice. Products like Rust-Oleum Tub and Tile Refinishing Kit create a hard, water-resistant finish that holds up well to kitchen conditions. The downside is a longer cure time (sometimes up to 72 hours) and the need to mix two components before application.
- Tile-specific acrylic paint is easier to work with and comes in more color options. It’s less durable than epoxy but still holds up well on backsplashes that aren’t directly behind the stove.
- High-quality acrylic enamel (like Benjamin Moore Aura or Sherwin-Williams ProClassic) offers good durability and a smooth finish. Use a satin or semi-gloss sheen for easy cleaning.
Choosing the right paint sheen matters here. Flat or matte finishes will show every grease splatter and are nearly impossible to wipe clean on a backsplash. Stick with satin, semi-gloss, or gloss for a surface that’s easy to maintain.
Should You Paint Over the Grout Lines Too?
In most cases, yes. Painting over both the tile and grout gives you a clean, uniform look and is much easier than trying to paint around each grout line. If you want visible grout after painting, use a grout pen in a contrasting color once the paint dries.
The answer depends on the look you’re going for, and there are a few approaches.
Painting over everything (tile and grout) gives you a clean, uniform appearance. It works well if you’re going with a light color like white or cream. Most backsplash projects go this route.
Keeping the grout lines visible creates more depth and makes the painted tile look more like actual tile. Paint everything one color, then go back over the grout lines with a grout pen in a contrasting shade.
From a professional standpoint, painting over everything is faster, more forgiving, and usually looks better.
How Long Does a Painted Tile Backsplash Actually Last?
Here’s where we’ll give you the honest answer that most DIY blogs gloss over. A painted tile backsplash is not a permanent solution. It’s a cosmetic upgrade with a limited lifespan.
With proper prep, quality products, and a protective topcoat, you can expect a painted backsplash to last three to five years in a kitchen that gets regular use. Some homeowners report theirs lasting even longer, especially in areas that don’t get hit with direct heat or heavy moisture.
The areas that wear fastest are directly behind the stove and around the sink. Heat, steam, grease splatters, and frequent wiping all take a toll on painted surfaces. You may need to do touch-ups in these zones after a year or two.
A few things that extend the life of your paint job:
- Apply a clear topcoat. A water-based polyurethane sealer in satin or semi-gloss adds an extra layer of protection against moisture and scratching. It’s an optional step, but we strongly recommend it for kitchen backsplashes.
- Clean gently. Use a soft cloth or sponge with mild soap and water. Avoid abrasive scrubbers, harsh chemical cleaners, and anything with bleach. These will strip the paint over time.
- Touch up damage quickly. If a chip or scratch appears, dab on a small amount of the original paint before the damage spreads. Once paint starts cracking or peeling, it’s much harder to contain.
Common Mistakes That Ruin a Painted Backsplash
We’ve fixed enough failed backsplash paint jobs to know the patterns. These are the mistakes that cause the most problems.
Skipping the degreasing step. Kitchen tile looks clean but almost never is. Invisible grease film prevents primer from bonding, and the whole job fails within weeks.
Using regular wall paint. Standard latex wall paint isn’t formulated for the demands of a kitchen backsplash. It can’t handle heat, moisture, or repeated cleaning. You need tile-specific paint or a high-performance enamel at minimum.
Applying thick coats. Thick coats look uneven, take forever to dry, and are more likely to drip, bubble, or peel. Multiple thin coats always produce a better result. If you’ve ever dealt with visible roller lines on a wall project, the same principle applies here. Thin, even passes with a foam roller are the way to go.
Using silicone caulk for repairs. Silicone creates a surface that paint can’t stick to. Always use paintable acrylic or latex caulk for any repairs before painting tile.
Not letting coats dry fully. Applying paint over primer (or a second coat over the first) before it’s fully dry traps moisture and weakens the bond. Follow the drying times on the can, even if the surface feels dry to the touch.
When Should You Replace the Backsplash Instead of Painting It?
Painting a backsplash is a great option in many situations, but it’s not always the right call.
If the existing tile is cracked, loose, or has water damage behind it, paint won’t solve the underlying problem. You need those tiles removed so the wall can be inspected and repaired.
If you’re doing a full kitchen renovation with new cabinets and countertops, it makes more sense to install new tile that coordinates with your updated design. A painted backsplash next to brand-new quartz countertops can look out of place.
And if you want a result that looks and feels like real tile for the next 20 years, new tile is the answer. Paint is a budget-friendly bridge, not a forever fix.
Ready to Update Your Kitchen?
Painting a tile backsplash is one of the most cost-effective ways to refresh your kitchen’s look. Get the prep right, choose the right primer and paint, and apply thin, even coats. That’s the formula for a finish that holds up for years.
If you’d rather skip the DIY and get professional results, Soho Painters can help. We handle kitchen projects of all sizes across Manhattan, from backsplash refreshes to full interior painting and apartment makeovers. Get in touch and let’s talk about your project.