Sandpaper is one of the most common tools that professional painters and construction workers use to accomplish their jobs properly.
Sandpaper, also called a hand pad or abrasive paper, involves particles or grains glued to the surface. This material is also typically used when undertaking DIY projects.
Sandpaper comes in different grits depending on your purpose and desired finish. When unfinished surfaces need to be leveled out before applying paint, sandpaper can be used.
If you’re not sure what grit sandpaper should be used for your walls, it is recommended to consult the sales personnel in the hardware store to avoid buying the wrong products. They’ll help you explore your options and help you choose the suitable one for your needs.
In this article, we will discuss what grit sandpaper should be used when painting. If you’re ready, let’s get started.
Basic Guide to Sanding Your Walls
If you’re undertaking a DIY home improvement project and you need to do some sanding in your interior walls, it is important that you know what kind of sandpaper grit you’ll need to buy.
For average wall surfaces in regularly trafficked areas that are usually painted and made of smooth wood paneling or plaster, it is likely that you need to use sandpapers with grit 60 and up to rough it up. This is especially true if they have gone through heavy wear and tear. Using grit 60 sandpaper can help create a better base for the paint that you will apply.
Meanwhile, if you live in an apartment or condo with neighbors who don’t cause too much commotion, you can use sandpaper with grit 220 to come up with a smooth finish.
You have to keep in mind that sanding is not as easy as it seems. You won’t just merely run the sandpaper over your walls’ surfaces and you’re good to go. It surely takes some time, patience, and effort to be able to achieve a nice sanded look. Once you’ve achieved this you can already start with the actual painting of your walls.
Tips When Sanding Your Walls Before Painting
While sanding seems pretty easy, it can be challenging for inexperienced painters. So here, we will share a couple of things that you must remember before taking on this task:
- The very first thing that you should think about is whether or not you need to prime the surface before painting it. Priming can help prepare your wall for the application of paint by filling up the cracks and crevices, in order for your paint to stick better. In some cases, such as when you’re repainting an old wall with wood panels that has already started peeling and with no visible cracks, then priming may be unnecessary.
- Doors with lead-based paint can be sanded using sandpapers with grit 60. Lower grit sandpapers can be used for sanding this type of paint that is soft enough. However, you need to make sure that you test it first in a small inconspicuous spot first before using for the rest of the wall.
- The higher the number of the grit, the smoother your wall would be and the more effective you can clean up the flaws before painting over it. So if you’re not sure what grit sandpapers to use, simply purchase those with higher numbers of grit 60 and up.
- If you’re aiming for a rougher finish or the walls you’re painting have blemishes and scratches all over them, it is important to use sandpaper with grit 220. Grit 220 is coarse, while 320 is fine. Those in the range of 100 to 150 will still be rough but can also be used to smoothen out most surfaces.
- If you’re only painting a small section of your wall, it is recommended to use low-grit sandpapers because higher grit can typically be bought in bigger sheet sizes.
- For wallpaper that requires stripping down before painting, you can soften the glue using a PVA stripper before using an adhesive remover to get rid of the paper as much as you can. Once you’ve managed to remove all of the wallpaper, you can use sandpaper with grits of 80 or 120 to roughen up the surface before priming and repainting the wall.
- Do your walls tend to become dusty? Make sure to wipe the surfaces clean by using a damp rag or sponge before you start sanding them. Since you will only end up scraping off the dust from the walls, which will fall off as soon as you start sanding, you don’t really need to dry-sand it first or use an electric sander before you begin hand-sanding them.
- For the last tip, it’s important to take note of the direction of the grain in your wall’s surface if there is one. Generally, you need to apply more pressure when moving the sander upwards and reduce the pressure as you go downwards. This is an important step in ensuring that your walls won’t get dented during the sanding process.
Work With the Best Professional Painters
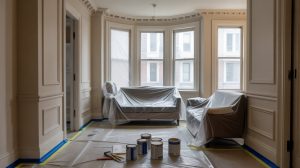
Sanding the surface is just part of the preparation measures before painting your walls. We know how exhausting and time-consuming it is to take on a DIY home improvement project. So if you want a hassle-free way of repainting your walls, simply hire a local contractor to do the job for you.
Soho Painters is the best apartment and commercial painting company in New York City. Aside from interior painting, we also offer drywall installation, wallpapering, venetian plaster, and custom murals.
Contact us today and let us chat about your next painting project!