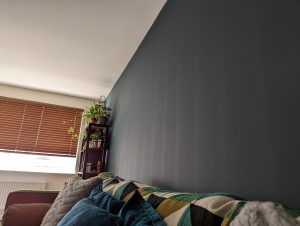
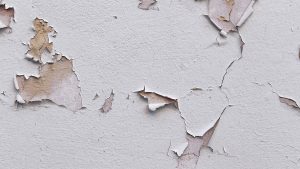
Have you ever moved into a new apartment or purchased a home where the previous owners had a preference for shiny, semi-gloss walls, but your aesthetic leans toward the subtle, sophisticated look of flat paint? Or perhaps you’re simply ready for a change in your current space, wanting to transition from the reflective quality of semi-gloss to the more contemporary matte appearance that flat paint provides. This is a common situation we encounter with our clients, and it brings up an important question: can you paint flat over semi-gloss?
At Soho Painters, we’ve helped countless New York City homeowners and businesses transform their spaces with the perfect paint finish. While the short answer is yes, you can paint flat over semi-gloss, achieving professional-quality results requires understanding the proper preparation and application techniques. Cutting corners can lead to peeling, uneven coverage, and a finish that fails to meet your expectations.
In this comprehensive guide, we’ll walk you through everything you need to know about transitioning from semi-gloss to flat paint. From understanding the fundamental differences between these finishes to the step-by-step process of preparation and application, we’ve got you covered. Whether you’re refreshing a single wall or undertaking a whole-home makeover, these professional insights will help ensure your project’s success.
Understanding Paint Finishes
Before diving into the how-to portion, it’s essential to understand what makes flat and semi-gloss finishes different and why proper preparation between them matters.
Flat Paint: The Subtle Sophisticate
Flat paint (sometimes called matte) has minimal reflective qualities, giving it a soft, velvety appearance. This finish is excellent at hiding surface imperfections and providing depth of color, making it particularly popular for:
- Living rooms and adult bedrooms where a sophisticated atmosphere is desired
- Ceilings, where you typically want to minimize attention
- Older walls that may have minor imperfections you’d prefer to disguise
- Low-traffic areas where cleaning is less of a concern
The downside to flat paint is its porosity. The same qualities that give it that beautiful matte appearance also make it more susceptible to staining and harder to clean without damaging the finish.
Semi-Gloss: The Durable Sheen
Semi-gloss paint, by contrast, contains more resins and binders, creating a surface that reflects significantly more light. This gives walls a distinct sheen and provides:
- Excellent durability and resistance to moisture
- A washable surface that stands up well to cleaning
- Good resistance to stains and scuffs
- A slightly reflective quality that can brighten spaces
These properties make semi-gloss particularly popular for kitchens, bathrooms, children’s rooms, and trim work where cleaning is frequent and moisture resistance matters. When painting trim with roller vs brush, semi-gloss is often the finish of choice for its ability to highlight architectural details.
The Challenge of Transition
The very qualities that make semi-gloss durable also create challenges when painting over it. The smooth, somewhat slick surface doesn’t provide the ideal “tooth” (texture) for new paint to grip. Additionally, the chemicals used to create that glossy finish can sometimes chemically interact with new paint, particularly if proper preparation isn’t conducted.
Many homeowners want to switch from semi-gloss to flat because design preferences have evolved. Where the high-shine look of glossier finishes was once the standard for interior walls, today’s design aesthetic often favors the more sophisticated, light-diffusing quality of flat or matte finishes which highlights how painting walls changes a room dramatically.
The Short Answer: Yes, But With Preparation
Can you simply open a can of flat paint and apply it directly over your existing semi-gloss finish? Technically, the paint will go on the wall. But without proper preparation, you’re likely setting yourself up for disappointing results, including:
- Poor adhesion leading to premature peeling and flaking
- Uneven color and sheen
- Visible brush or roller marks
- A finish that may look acceptable initially but degrades quickly
The good news is that with the right preparation steps, you can absolutely achieve professional-quality results when painting flat over semi-gloss. The key is understanding that the glossier the existing finish, the more preparation is required to ensure proper adhesion of your new flat paint.
Many homeowners wonder if primer is necessary for painting walls when changing finishes. When transitioning from semi-gloss to flat, the answer is almost always yes. Primer creates a bonding surface between your glossy existing paint and your new flat finish, dramatically improving adhesion and final appearance.
Preparation Process
The success of your paint project largely depends on the quality of your preparation. Here’s what you’ll need and the steps to follow for optimal results when painting flat over semi-gloss:
Supplies You’ll Need
- TSP (trisodium phosphate) cleaner or alternative
- Sanding materials (medium grit sandpaper, sanding sponges, or potentially a power sander for larger areas)
- High-quality bonding primer
- Premium flat paint
- Drop cloths
- Painter’s tape
- Quality brushes and rollers
- Cleaning rags
- Safety equipment (goggles, dust mask, gloves)
Step 1: Surface Cleaning
Start by thoroughly cleaning the semi-gloss surface. This step removes dirt, grease, and other contaminants that would prevent proper adhesion:
- Mix TSP according to package directions or use a dedicated wall cleaner
- Wash the entire surface, paying special attention to areas near switches, handles, and high-touch zones
- Rinse thoroughly with clean water (if using TSP)
- Allow to dry completely
This cleaning step is non-negotiable. Even invisible film from cooking, candles, or everyday living can compromise your new paint’s ability to bond.
Step 2: Sanding the Surface
Next comes the crucial step of creating texture for the new paint to grip. You don’t need to remove all the semi-gloss; you just need to rough up the surface:
- Use medium-grit sandpaper (120-150 grit) to lightly sand all surfaces
- Focus on creating a uniformly dull finish rather than removing the old paint
- Pay special attention to extra glossy or very smooth areas
- After sanding, wipe away all dust with a tack cloth or slightly damp rag
Many DIYers wonder what grit sandpaper before painting walls is appropriate. For deglossing semi-gloss paint, medium grit is usually ideal – rough enough to create texture but not so rough that it damages the wall.
Step 3: Priming
While some newer paint formulations advertise “paint and primer in one,” when covering semi-gloss with flat paint, a dedicated bonding primer is strongly recommended:
- Choose a high-quality bonding primer specifically designed for glossy surfaces
- Apply primer according to manufacturer directions, usually with a roller and brush for edges
- Ensure complete, even coverage
- Allow to dry fully (typically 24 hours, but follow product instructions)
Many people ask if you need an undercoat when painting walls, especially when changing finishes. When going from semi-gloss to flat, the primer acts as that crucial undercoat, promoting adhesion and ensuring a uniform final appearance.
Step 4: Testing
Before committing to the entire surface, it’s wise to test your system:
- Choose an inconspicuous area
- Follow the full preparation process
- Apply your chosen flat paint
- Allow to dry and evaluate the results
This test area will confirm whether your preparation was sufficient and if the finished look meets your expectations.
Step-by-Step Guide to Painting Flat Over Semi-Gloss
Now that your surface is properly prepared, it’s time to apply your flat paint. Following these steps will help ensure professional-quality results:
Room Preparation
- Remove as much furniture as possible or consolidate it in the center of the room and cover with drop cloths
- Cover floors with canvas or plastic drop cloths
- Remove switch plates, outlet covers, and hardware
- Apply painter’s tape to trim, ceiling edges, and any areas not being painted
- Ensure good ventilation
Application Techniques
When applying flat paint over a properly prepared semi-gloss surface, follow these best practices:
- Cutting In: Begin by “cutting in” (painting the edges with a brush) around the ceiling, corners, trim, and other areas your roller can’t easily reach. Work in sections of about 3-4 feet at a time.
- Rolling: While your cut-in areas are still slightly wet, use your roller to apply paint to the main wall areas. This “wet edge” technique helps minimize visible lines between brushed and rolled areas.
- Use an extension pole for higher areas rather than stretching or using a ladder when possible
- Apply with slightly overlapping W or M shaped strokes for the most even coverage
- Don’t oversaturate the roller, as flat paint is more prone to drips and runs than semi-gloss
- First Coat Coverage: Flat paint often covers better than glossier finishes, but when going over semi-gloss, you’ll almost certainly need two coats for perfect coverage.
Many homeowners ask if you have to cut in twice when painting walls, and with flat over semi-gloss, the answer is usually yes. Each coat should include both cutting in and rolling for the most uniform appearance.
Between Coats
- Allow the first coat to dry completely according to the manufacturer’s recommendations
- Assess the coverage and make note of any areas needing special attention
- Lightly sand any drips, runs, or imperfections with fine-grit sandpaper
- Wipe the surface with a tack cloth to remove dust
- Apply the second coat following the same techniques as the first
Final Touches
- Allow the final coat to dry completely before removing painter’s tape
- Pull tape off at a 45-degree angle for the cleanest edge
- Touch up any areas where necessary
- Replace all hardware, switch plates, and fixtures
Most professionals advise waiting at least 2 weeks before attempting to wash or scrub newly painted flat surfaces. When considering painting walls with tape up, we recommend waiting at least 7-10 days for flat paint to fully cure.
Common Challenges and Solutions
Even with careful preparation, you might encounter some challenges when painting flat over semi-gloss. Here’s how to address them:
Adhesion Problems
Signs: Paint peels, bubbles, or flakes, especially when cleaned or lightly scratched.
Solution: If you notice this before completing the project, stop and revisit your preparation. The surface likely needs more thorough sanding or a more appropriate bonding primer. For already completed areas showing adhesion issues, you’ll need to remove the failing paint, properly prepare the surface, and repaint.
Uneven Sheen or “Flashing”
Signs: Areas of different sheen levels are visible, particularly at the transitions between brushed and rolled areas.
Solution: This typically indicates an uneven application or improper roller technique. Apply another coat using consistent application pressure and maintain a wet edge between sections.
Roller Marks and Texture Issues
Signs: Visible roller patterns, stippling, or texture differences in the finished surface.
Solution: Flat paint is particularly susceptible to showing roller texture. Use a high-quality roller cover appropriate for flat paint (usually a shorter nap), maintain consistent pressure, and ensure you’re not overworking the paint once it begins to dry.
Color Inconsistency
Signs: The color appears different in some areas or changes as the paint dries.
Solution: This often indicates that the primer wasn’t applied evenly or that some areas of the semi-gloss are still affecting the appearance. An additional coat of flat paint, or in severe cases, priming problem areas and repainting, will usually resolve this issue.
A question we often receive is whether you can paint eggshell over semi-gloss without preparation. The same principles apply – proper preparation is key regardless of which less-glossy finish you’re applying over semi-gloss.
Professional Tips for Best Results
After years of helping New York homeowners transform their spaces, we’ve gathered some professional insights that can make a significant difference in your results:
Quality Materials Matter
While it might be tempting to save money on paint when undertaking a large project, the quality of your materials directly impacts both the appearance and longevity of your finish. With flat paint in particular:
- Higher-quality flat paints contain more pigment and better resins, providing superior coverage and durability
- Premium primers create better adhesion between your semi-gloss and flat paint
- Professional-grade rollers and brushes reduce streaking and provide more even application
Environmental Considerations
The environment plays a surprisingly important role in paint application:
- Ideal temperature range is typically 50-85°F (10-29°C)
- Humidity below 50% is optimal for most latex paints
- Avoid painting in direct sunlight, as this can cause the paint to dry too quickly and show lap marks
- Ensure good ventilation, but avoid strong drafts directly on freshly painted surfaces
Application Nuances
Some subtle techniques can elevate your results:
- Box your paint (mix all cans together in a larger container) to ensure color consistency, especially for flat paint which can show slight variations more noticeably
- When using flat paint, maintain a consistent wetness on your roller – too dry and you’ll get excessive stipple; too wet and you risk drips
- For large projects, consider using an airless sprayer and back-rolling for the most uniform finish
Many homeowners wonder if they need to sand primer before painting walls with flat paint. For most standard situations, light sanding of the primer can help achieve an ultra-smooth flat finish, but it’s not always necessary with modern primers.
Maintenance and Care for Flat Painted Surfaces
One important consideration when switching from semi-gloss to flat is the difference in maintenance requirements. Flat paint, while aesthetically pleasing, requires different care than the more durable semi-gloss you’re replacing:
Cleaning Considerations
- Avoid scrubbing flat paint, as it can burnish the surface (make it shinier) or remove the paint
- Use soft cloths or sponges with mild, non-abrasive cleaners
- Spot-clean rather than washing entire walls when possible
- Consider flat paint formulations marketed as “washable” for higher-traffic areas
Touch-Up Strategies
Unlike semi-gloss, flat paint typically touches up well:
- Keep leftover paint properly sealed for future touch-ups
- When touching up, use the same application tool as the original paint job
- Feather the edges of your touch-up to blend with existing paint
- For very small marks, try a magic eraser-type product before resorting to paint
Longevity Expectations
While semi-gloss can often last 7-10 years before showing significant wear, flat paint in lived-in spaces typically:
- Begins showing wear or soiling in high-traffic areas within 3-5 years
- May need touch-ups around switches, doors, and high-touch areas more frequently
- Will generally require repainting sooner than its glossier counterparts
The question of how many times can you paint a wall before needing more extensive preparation is relevant here. With proper preparation between coats, walls can be painted many times, but excessive layers (typically 7+) may eventually require stripping to prevent texture issues.
Conclusion: Achieving a Professional Flat Finish Over Semi-Gloss
Transitioning from semi-gloss to flat paint is absolutely achievable with the right preparation and techniques. At Soho Painters, we’ve helped countless New York residents transform their homes and businesses with expert painting services that stand the test of time.
The key takeaways for success when painting flat over semi-gloss are:
- Never skip the preparation steps of cleaning and sanding
- Use a high-quality bonding primer specifically designed for glossy surfaces
- Invest in premium flat paint and quality application tools
- Apply at least two coats for the most uniform and durable finish
- Adjust your maintenance expectations for the more delicate flat finish
If your project feels overwhelming or you want to ensure professional-quality results, our team at Soho Painters offers comprehensive interior painting services throughout New York City. With decades of experience transforming apartments and homes across Manhattan, Brooklyn, and Queens, we have the expertise to handle projects of any size.
Ready to transform your space with a beautiful flat finish? Contact us today for a consultation and estimate. Our professional team at Soho Painters is just a click or call away through our contact page. Let us help you achieve the sophisticated, modern aesthetic that only a perfectly applied flat finish can provide.


