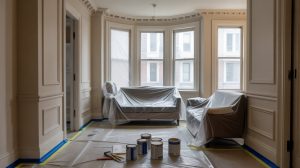
The debate of whether you should paint the wall or trim first always comes up when you’re trying to update a room. But when painting the wall trim, you’re faced with another conundrum of whether to use a roller or a brush.
Wall trims may just be decorative pieces but they can add an extra touch of elegance to make a room look more cohesive. But to get those perfectly crisp lines, you have to be careful with the technique you’ll use for painting. To help you paint like a professional, below is a quick guide on when to use a roller or brush for painting trims.
Is it better to paint trim with a roller or brush?
The decision to use a roller or brush will depend on the type of trim you’re trying to paint. If the trim mostly has a flat surface, a roller would be handy for this job since it can apply the paint evenly and efficiently. But if the trim has an intricate design, it would be wise to use a paintbrush since it can get into the crevices.
But one downside to using a brush is it will take you longer to cover the surface, so you’ll have to work faster before the paint dries. Once it does, the finish can look splotchy and uneven instead of neat.
If you don’t have a steady hand, using a roller can also get messy if you’re not careful. So if you’re not confident you can get a precise layer of paint on the trim, it might be best to use a brush instead.
Since you’re painting trim, it’s also recommended that you get the right tools for the job. There are trim rollers and brushes that are the perfect size for painting wall trims. Also, consider splurging on higher-quality tools since cheaper nap rollers can leave unwanted lint on the paint while lower-quality brushes can shed their bristles easily.
How do you prevent brush marks when painting trim?
Brush marks on the trim can give a room a homey charm, but if you want a more polished finish there are a couple of tricks you can do. Some painters like to use a trim roller to apply the paint evenly and immediately follow it up with a brush to spread the paint and go over the details of the design.
While some pros prefer to add 2-3 ounces of water to the formula to make the paint thinner. This will make it less sticky so it can easily glide through the surface when applied with a brush. You can also use a paint extender to dilute the paint but take note that it can also prolong the trim’s drying time compared to if you just use water.
What kind of paint do you use on wall trim?
The type of paint you use will also affect how the trims look even if you use the right tools for the project. Considering trims, like baseboards, moldings, windows, and door frames, are more susceptible to wear and tear, you’d want to choose a paint that can withstand the damage.
That’s why semi-gloss or high-gloss paints are usually recommended for painting trims since they’re durable and easy to clean. Their glossy finishes create a thick seal that can protect the woodwork against moisture and stains.
But although high-gloss paint is the toughest formula due to its high resin content, it can also show imperfections on the trim. If you don’t want the cracks or damages to be noticeable, a semi-gloss paint may be more suitable for your room. It has less shine than high-glass paint but it can still create an elegant contrast against the walls.
Most pros would also go for an oil-based high gloss or semi-gloss paint since it doesn’t dry as fast as a water-based one. Oil-based formulas also level out better so brush marks will less likely to appear.
How to paint wall trim
Every experienced painter knows that you should paint a room from top to bottom, which means the trims will usually be painted last. If you’re worried about getting paint on your freshly-coated walls, you can follow the steps below on how to paint the trims properly:
1. If you’re working with bare wooden trims, make sure to sand the surface first to provide a smooth finish for the paint to adhere to. Once you’re done, wipe the trims with a damp towel to remove any dust particles and let them dry completely.
2. If the trim has any cracks or holes, make sure to fill them with spackling compound and allow it to dry completely. But if you’re dealing with large dents or gouges, it’s better to use a durable wood filler to repair the area.
3. Once the filling compound is set, go over the patched area with sandpaper to smoothen any rough edges. Then, wipe the areas with a damp cloth to remove any dust and let them dry completely.
4. Once you’re done repairing, apply painter’s tape on the edges of the trim. This will ensure you won’t go over the lines and reapply the paint on the walls.
5. For a more professional-finish, prime the trims with 1-2 coats of primer. Allow each coat to dry completely before applying another layer.
6. Once the primer is completely dry, you can finally apply your trim paint. You’ll also need to put 1-2 coats of paint, but remember to let each coat dry to the touch before applying the next layer.
Need help with painting your home?
If you’re still unsure whether a roller or brush is best for painting your wall trims, maybe it’s time to call in the professionals. Soho Painters has a team of professional painters that are equipped with the technology, supplies, and training to give your house the best makeover. Whether you’re looking to paint a residential or commercial space, they’re the best contracting company in New York. For questions or inquiries, you can contact them now so you can book a free estimate.