Although trims aren’t essential, you must admit they elevate the look of a room. Whether you want to impress with an intricate chair railing or keep it subtle with simple crown molding, there’s always a style that suits your aesthetic.
But to make a style statement, the paint on your trim matters. The time you spend deciding which color to apply would be wasted if it doesn’t appear crisp and smooth. So how many coats of paint should you apply to the trim? The answer to your question and more will be discussed below.
What is a trim?
A wall trim is a type of molding that’s used to frame walls, floors, doors, or windows. Depending on the style, it can also elevate the look of a room by adding an elegant detail.
Considering trims come in a wide array of designs, they can fit into traditional or modern homes. But you can tailor them to your home’s aesthetic by customizing their colors.
White trims create a refreshing contrast against other hues, while dark trims add a bold statement for framing light-colored walls. But you can also leave its natural wooden surface exposed if you’re looking for a natural look.
Does trim need one or two coats of paint?
If you’ve settled on the color you want to paint the trims, the question of whether to use one or two coats naturally comes next.
Similar to painting walls, it’s always best to apply two coats. This ensures your trims are well-protected against scuffing and moisture, so they last longer. It also provides better coverage, so the color won’t appear blotchy and uneven. This also saves you on painting costs in the long run because you’ll only need to apply one coat if you want to freshen up its color in the future.
Can you use any paint for trim?
Technically, semi-gloss or high-gloss paint can be suitable for trims because they’re durable enough to protect them from damage and moisture.
But if you want paint with a longer lifespan, opt for trim paint instead. Granted, it’s more expensive than regular wall paint, but it’s formulated to dry into a moisture-resistant hard finish. It also prevents your trims from sagging and yellowing over time, so you won’t have to worry about replacing them in a few years.
Trim paint also comes in high-gloss, gloss, semi-gloss, and satin finishes, so you can have your pick depending on the look you want to achieve.
Do you need to prime trim before painting?
If you have brand new trims that haven’t been painted before, you’ll want to apply 1-2 coats of primer for good measure. It will add an extra layer of protection against damage and provide a better surface for the paint to adhere to.
But if you’re only refreshing the paint with the same shade, you won’t need to prime it unless you want to transition from a darker hue to a lighter one and vice versa. The same goes for when you want to switch from oil-based paint to a water-based formula because these two types don’t necessarily mix.
Lastly, you’ll want to prime your trims after repairing them from wear and tear since it will smoothen up previously filled-in holes and cracks so they’re less noticeable.
Is it better to paint trim with a roller or brush?
If you can’t decide between a roller or brush for painting trims, the final decision will depend on what type of design you’re dealing with.
Paint rollers will be more efficient for covering flat trims, but you have to be careful to use a steady hand or else it will be messy. If you’re painting a smaller area, like crown moldings and baseboards, there are trim rollers available that will help you achieve a neater finish.
But if the trim has intricate details, it’s better to use a paintbrush. This will ensure you’ll get every crevice without ruining the paint on the walls. But considering it will take you longer to finish, remember to apply paint in sections so it doesn’t dry out and appear blotchy later.
Can you paint trim without tape?
If you’re confident that you have a steady hand, you might get away with not using painter’s tape. But even professional painters prefer to apply them on the edges to ensure they get a crisp line.
You have to consider that painting trims is no easy job, especially if it has intricate details that you need to get into. The trick is to take your time because the job requires precision. So if you’re rushing through the process, you might end up getting paint on the walls – especially if you’re not planning on using tape!
What is the best way to paint trim?
Ideally, you’ll want to paint trims before they’re installed because you won’t have to worry about ruining the paint on your walls. But if you’re repainting old trims, here’s how the process should go:
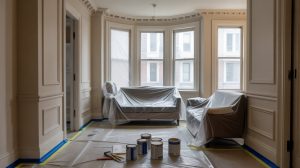
- Move away as much furniture and fixtures away from the trims. Lay a drop cloth on the floor to protect it against drips and splatters.
- If you’re repainting old trims, remove cracked and peeled paint by sanding.
- Fill in holes and cracks with spackle or wood filler. Then, allow them to dry completely.
- Wipe the trim with a damp cloth to remove dust and stains.
- Place painter’s tape on the edges of the trims.
- Apply 1-2 coats of primer, allowing each layer to dry before adding the next coat.
- Use a paint roller or brush to apply the paint carefully. Wait for the first coat to dry completely before layering the second coat, and you’re done.
Looking for a reliable painting contractor?
For crisp and smooth trims, let Soho Painters handle your painting project. They have a team of experienced painters that are equipped with the best training and materials. If you’re thinking of sprucing up your house, they also offer wallpapering, interior and exterior services. For questions or inquiries, feel free to contact them now and get a free estimate.